Import Android Studio project in SVN (Subversion)
Import Android Studio project in SVN (Subversion)
This post of the series is for version control management in Android project Development. Let’s start from SVN. Then we move to Git.
Always worried at the time to import and setup your Android Studio project in SVN!!!

Don’t Worry here are some steps to do it simply…. :)
Prerequisite:
- But obvious Android Studio.
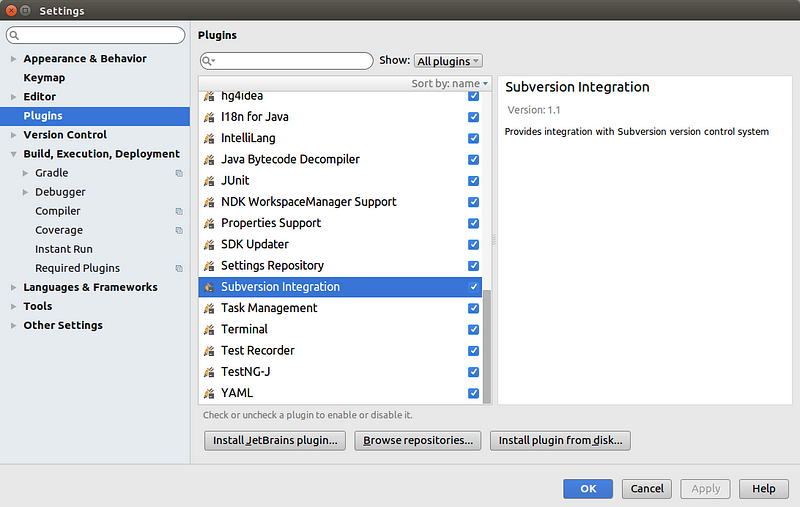
- Enable Subversion plug-in.
If not, then go to settings → search for “Subversion Integration” → Enable it and Apply→Restart Android Studio.
Hurray!! Subversion plug-in enabled.
Let’s start importing your project to SVN.
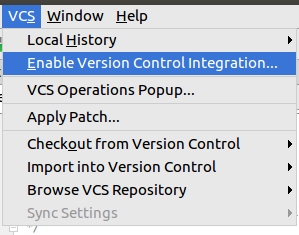
1. Enable Version Control
Go to VCS menu → Enable Version Control Integration
Go to VCS menu → Enable Version Control Integration
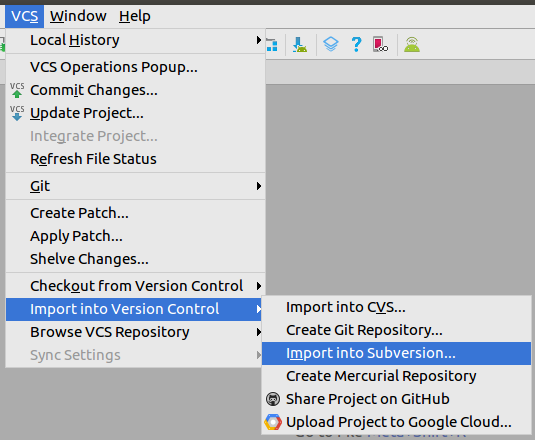
2. Add Your SVN Url
Go to VCS menu → Import into Version Control Integration → Import into Subversion
Go to VCS menu → Import into Version Control Integration → Import into Subversion
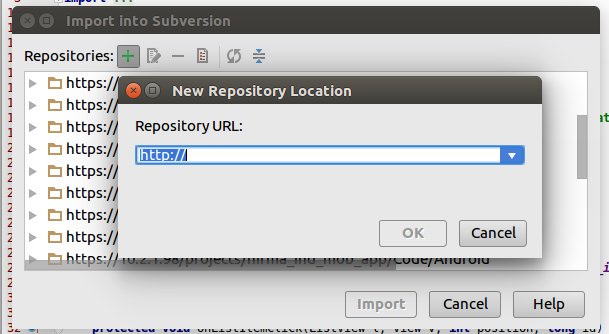
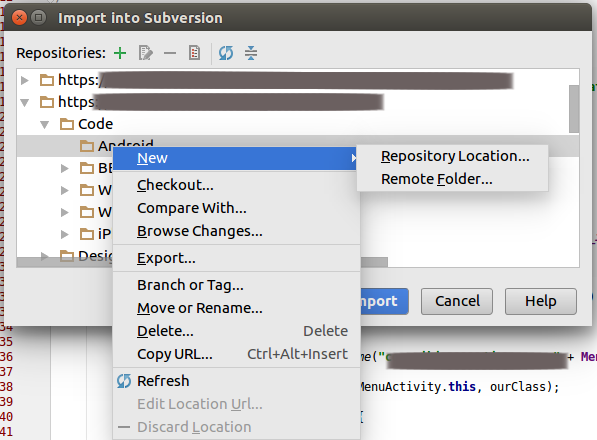
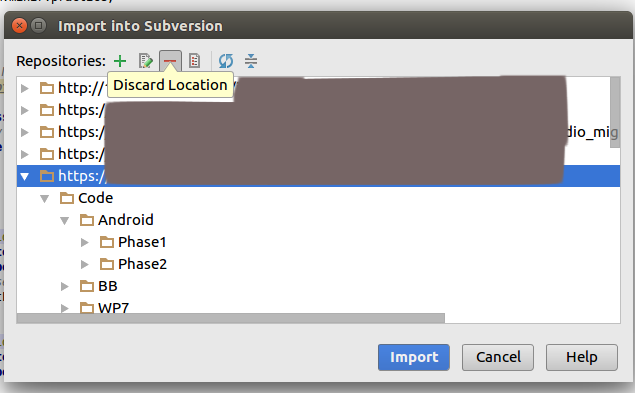
3. (Optional) Add Remote folder into the Repository
- It is recommended to make a new folder for different phases of your project. By doing this you can manage versioning quite easily.
- Copy Url for that folder destination
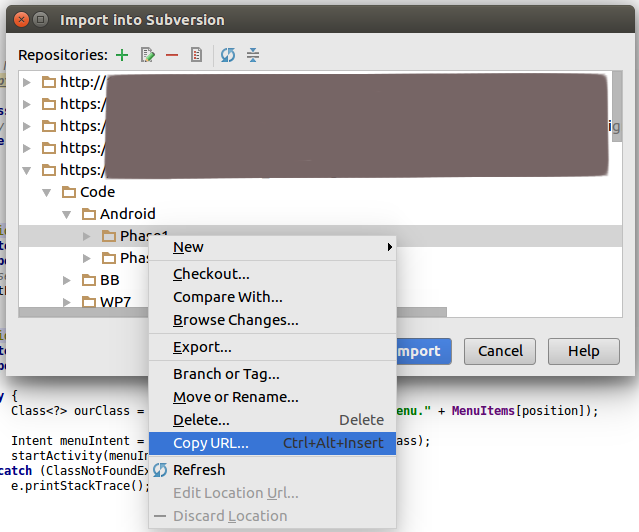
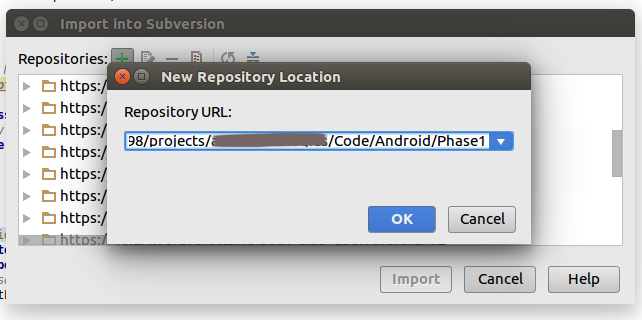
- Add new copied Url
- Discard old Url
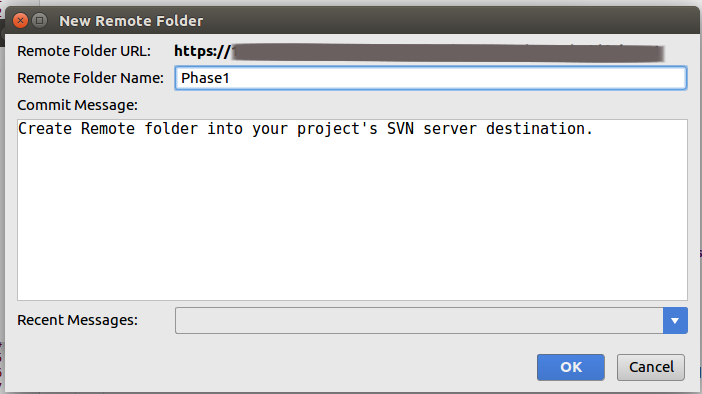
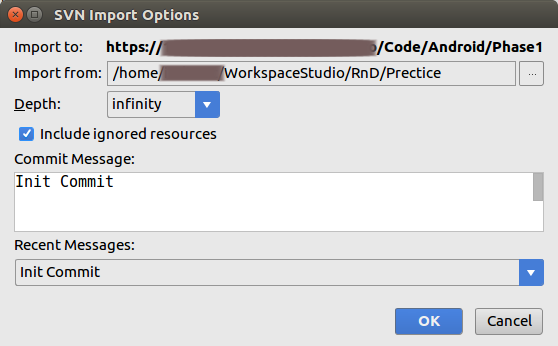
4. Import project into SVN

- The final step for importing the project, Set commit message and “OK”.
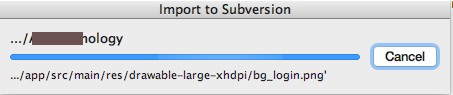
…. Wait till upload process is completed.
Now the project is on the subversion server…. What next, right?
Let do some refinements in Uploaded project, it will lessen your headache every time you check out from the repository.
Delete Ignore files
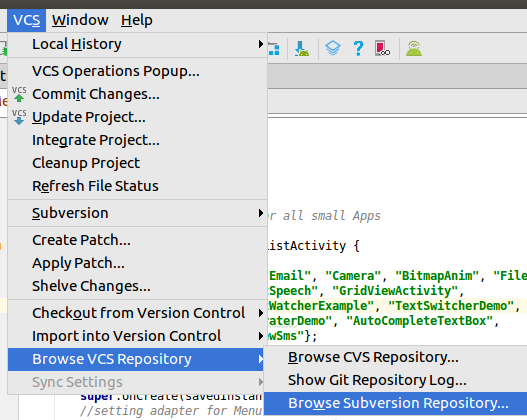
1. Browse Subversion Repository
2. Delete unnecessary files and folders from the projects SVN Repository, which must be ignored at the time of SVN operations.
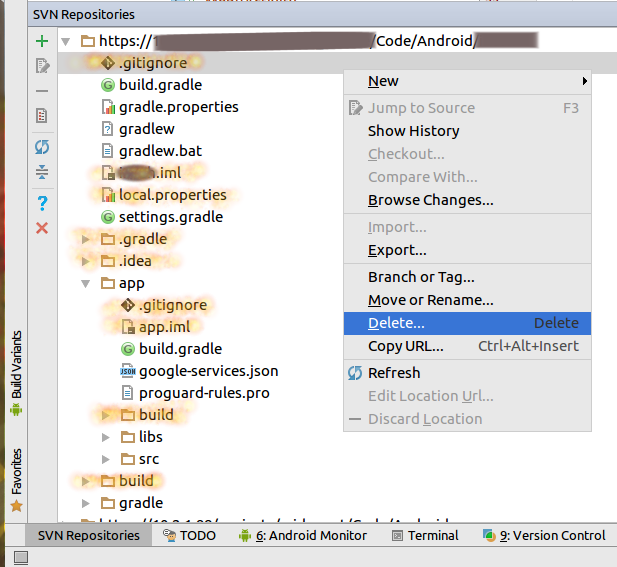
Below are listed for ignoring files:
- .DS_Store (created by MAC OS)
- .iml (From the main project directory and From all added module directory)
- local.properties (part of the SDK and NDK differ as per system by the system)
- .gitignore (Optional if you don’t want to)
Below are listed for ignoring folders:
- .idea
- .gradle (generated every time as per version of the individual’s system)
- Build (From the main project directory and From all added module directory) → (generated every time while the project builds)
Hurray!!! Now your SVN Repository is ready for Checkout.
Keep Visiting, will show SVN Checkout steps in the next post.
Happy Coding!!!
Thank you very much for this
ReplyDeleteThank you for sharing such informative post.
ReplyDeleteUrbanclap clone